
Meet our Rider
Already a great time trialist, this is a rider in a good position, with well thought out bike/equipment, who I'd done some out and back testing with a few years ago. We found some serious speed in that outdoor testing. He has made extremely smart choices in regards to his equipment and clothing, meaning he is FAST already! So I had my work cut out :-)


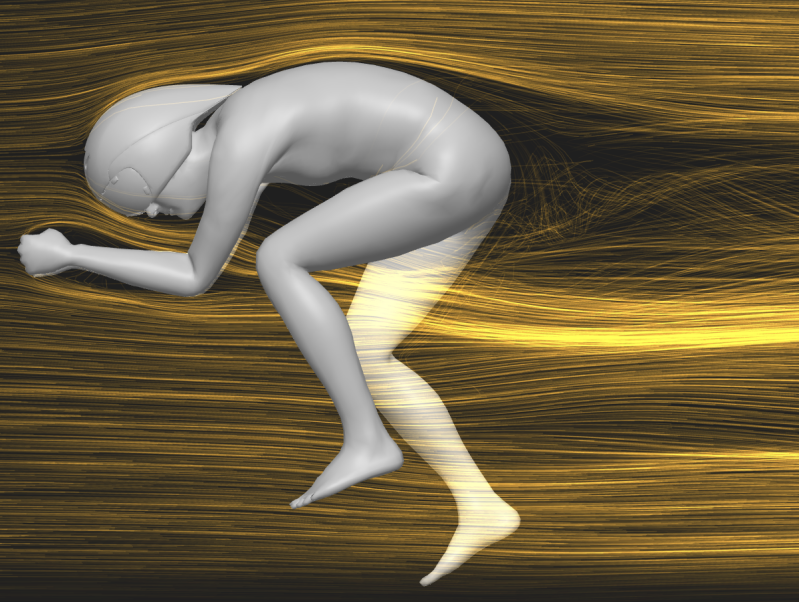
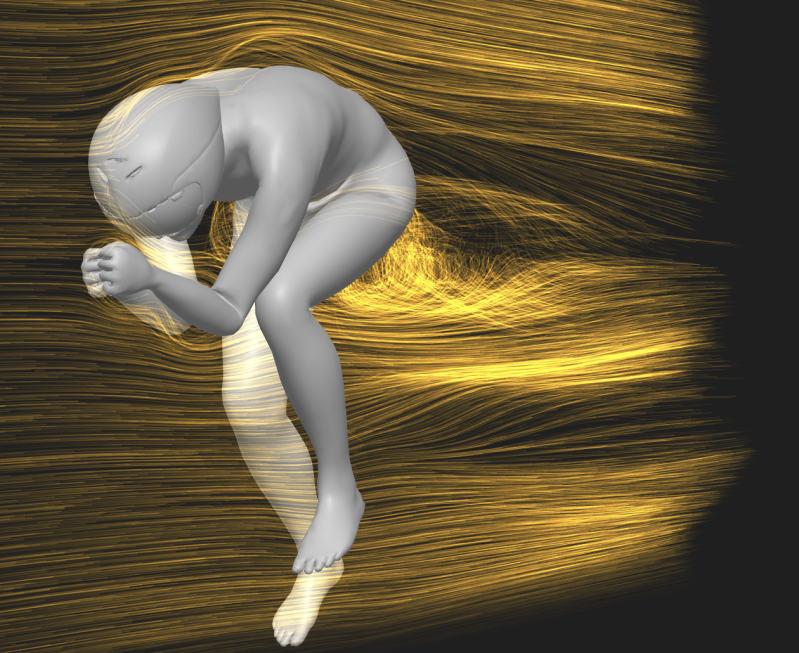
On the left you can see the digital mannequin before it's been put into the exact position for CFD testing. You get the digital mannequin by uploading some photos and some basic measurements into the app, and the AI produces a mannequin of your rider. The Airo App puts the mannequin in a basic position, depending on the type of bike they will be on. Then it's up to you to match it accurately to your exact rider position.
CFD Bike Fit
This is where things get serious...we have to find some speed in someone already well optimized. This is where the combination of CFD Bike Fit and velodrome testing come in.
We started last month with a CFD Bike Fit. This process is such a massive step forward in aero testing. It allows us to quickly find a baseline CdA for the rider and then start iterating through position changes, finding the direction of changes that give us speed.
What was particularly good, was that the CdA from the CFD, gave us the same CdA as our previous aero testing, giving us confidence that the systems were working well, and that we can trust our results....which is the most important thing.

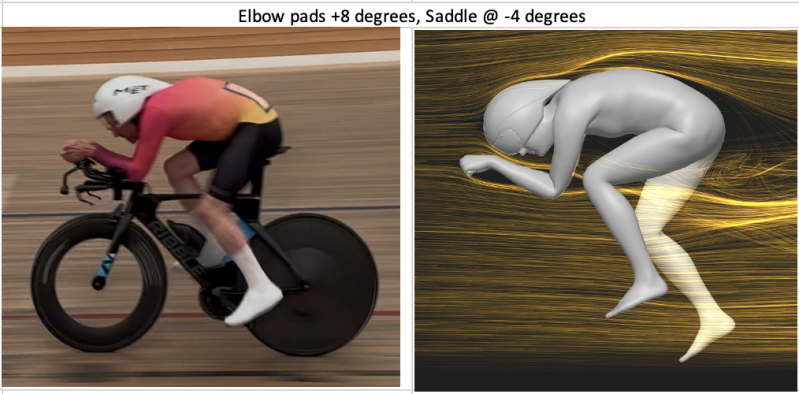
As you can see in the silhouette above, small changes can be tested to find the direction we need to explore further for more speed. In this case, it also allowed us to explore some relatively radical options, and see if there's speed there too.
Since TT's here in Switzerland are subject to the UCI rules of bike fit, the CFD testing comes in extremely useful in explore both forward and rear ward seat options very quickly in CFD instead of testing in the velodrome where you have to physically change the bike, which can be very time consuming.

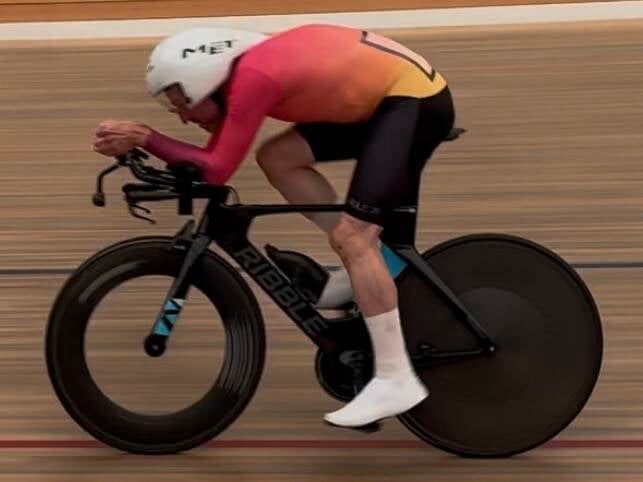
Baseline Position - in CFD above, and on the velodrome below
CFD - Results
There are clear signs from the CFD testing that some adjustments offer improved performance, and others don't. What we can do now is test the promising options in the velodrome. The great thing about the CFD testing is that we can know the limits of the rules and the bike, which means we only test what is physically possible within the rules and explore the edges of what is possible to find what has potential.


Baseline Saddle @5cm behind BB - 3.9% Faster Saddle @0cm behind BB - 4.4% Faster


Elbows Closer - 3.9% Faster Hand Stack 2cm Higher - 4.4% Faster Hands High and Rotated - 5.9% Faster
What We Learned from the CFD
The great thing was that we had some very clear options to try in the velodrome. The saddle position seemed to offer some big gains. But how would it feel to ride? That's where the velodrome comes in. It was also interesting to see that hand position makes quite a big difference. Though for me, the challenge would be to try to bring the arms and face closer together, as that also showed big gains.
The difficulty in getting the front end position as we want is the constraints of the UCI rules. With only 10cm allowed between the centre of the arm rests and the top of the extensions (for a category 1 rider) we struggled to get the hands higher.
I did try some simulations with changes in stack height (not pictured), but they were all slower than the baseline. Which is consistent with what we found in the out and back testing we did in a previous season...again re-enforcing my confidence in the CFD analysis.
Velodrome Testing
Now we are in the velodrome, we can test our changes closer to the real world, and the velodrome gives us the added bonus of testing the position, balance and vision on the bike and also testing equipment changes to find the optimal racing package that will be as fast as possible in the real world.
The Plan
- Baseline x 2
- With bike set-up as it was for the CFD photos
- Saddle Positions:
- Forward 2cm (to 5cm behind BB)
- Forward to 2.5cm behind BB
- Forward to 0cm behind BB
- Hands High
- Elbow Narrow
- 2 Front Wheel Options

As always with velodrome testing, you have to follow the numbers and your instincts. If you suspect something is out of the ordinary, repeat it. If you want to try combinations of things, sometimes you have to choose, because you cannot test everything...so follow your instincts! That's where experience comes in.

Velodrome Testing - Results
On the Left is a list of the tests we carried out at the velodrome. It's a tough old day testing in the velodrome!! All the accelerating, holding position and concentrating to make sure you are consistent with your bod position, line and power...it's a real skill.
The first half of the tests are all trying to find the speed in the saddle forward position. We never quite found the speed that the Airo App suggested, but that was partly because the rider couldn't physically achieve the head position required due to the shorter distance to the arm rests. In non-UCI events you could extend the front end and maybe we find that speed...but this is a set-up constrained by UCI rules, so we couldn't quite make it work. So, in the second half of the session, we moved to the rear saddle position (over 5cm behind the BB) and started looking for speed there.
With the saddle back we were able to find all the gains suggested by the Airo App. The baselines in the App and in the velodrome were identical to 3 decimal places, with the optimized position in the App being 5.9% faster. We worked super hard in the velodrome to find the gains and ended up with an optimized position 6.2 % faster.
What this Means for Performance
The most important thing in all this testing is that you can a safe, sustainable position that is fast!
By the end of the session we knew we had a position that fit all those, and a 6.2% decrease in CdA is really good for someone who has tested before.
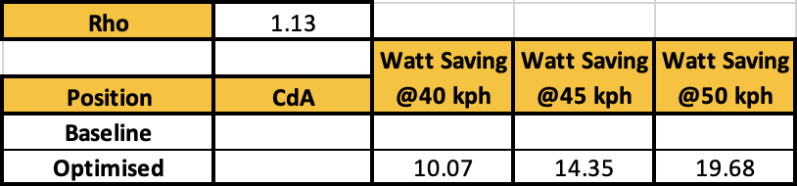
What this means for performance is shown on the right. At the same air density of the test day, this gain would save the rider between 10 and 20 Watts, with his race speed being between 40 and 45 kph, it's between 10 and 15 watts, which is a nice gain.
Performance Gains!!
Time Trial Performance

This TT simulation is assuming a flat TT with no wind, but is a good illustration of what the 6.2% decrease in CdA will do over 20km. Over 30 seconds in such a short TT is a massive performance improvement.
Generally speaking, the harder the conditions the more of an advantage the lower CdA gives you over your competitors, so this is actually the minimum you can expect and
Comparing the CFD and Velodrome Results
Not all tests were directly comparable, but as we gradually made changes to the bike, there were steps along the way that corresponded to the tests done on the Airo App.
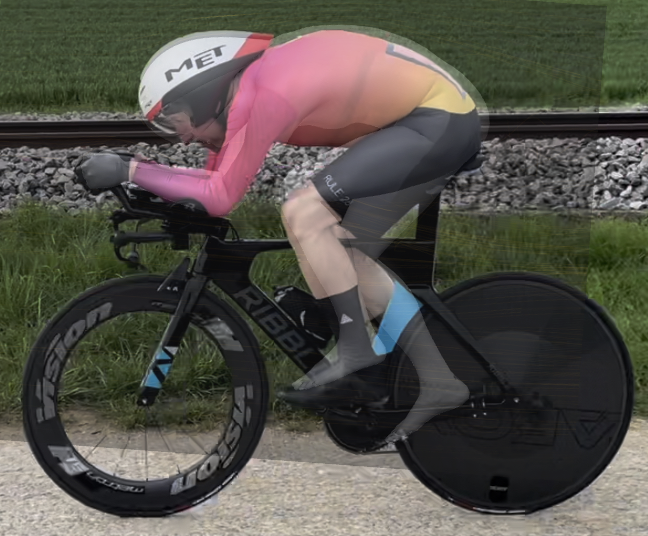
Baseline
Bearing in mind that the baseline for the CFD is done on a stationary trainer, the similarity to the velodrome baseline is incredibly good. And as I said before the CdA came out identical!! To illustrate it further, the 4 small images below are the digital mannequin of the rider superimposed over a picture of him riding outside.


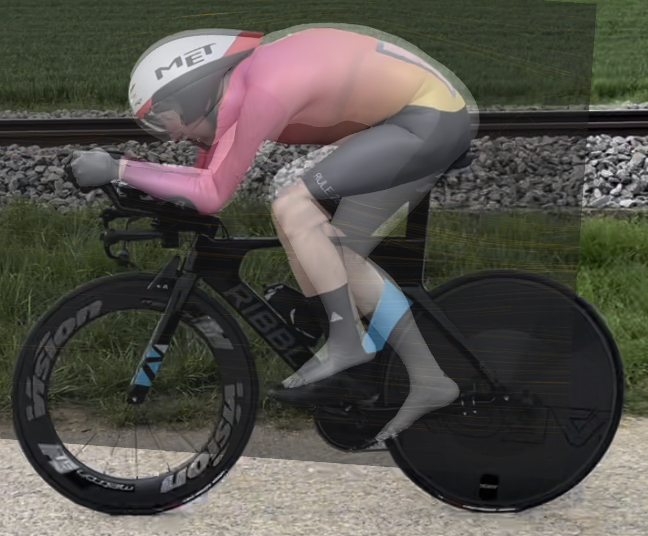

Hands High Position
This is another test where the velodrome test and Airo Test overlapped directly.
There is a difference in head position/face angle. Which when I was working on the app I didn't quite get right. But the CdA's correlated well and both the images on the left were 3% faster than baseline.
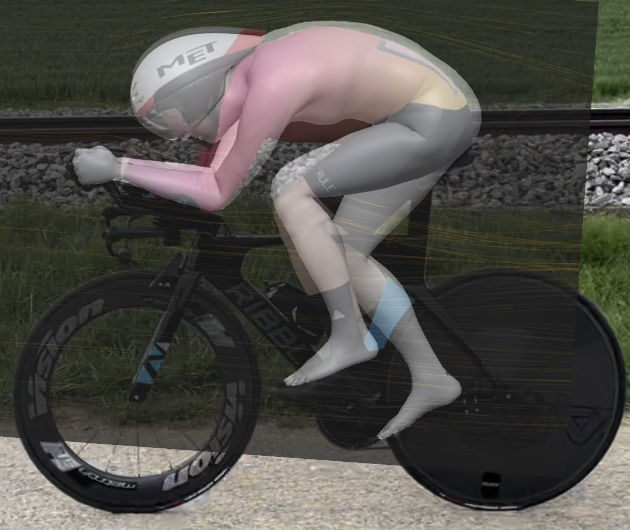
Optimized Position
Finally, the optimized position was also very close, with the velodrome and Airo CdA only 0.001 apart...which is incredible!
Again, you can see the difference in head position. When I'm making changes on the Airo App, you are having to make some assumptions on how the rider will adapt to the changes on the bike.
And then when you are in the velodrome you are trying to adapt the bike to create the shapes you want...it's not easy and took a lot of work!
Conclusions
The first thing to say is that being able to have objective way to experiment before you go to the velodrome is really helpful! I've done quite a few Airo Test Sessions now, and each time you learn. I'm starting to see a few patterns of how to help make a faster position. But still you occasionally you get some surprises. And I've found when you try to make bigger changes, it's a little hard to predict exactly how the body will choose to solve the new movement puzzle...can be hard to predict. As a Physio and Biomechanist, I feel I've got a decent idea of how to manipulate the digital mannequin, but like in this case, the extreme forward position was fast in digital form, but physically not possible. So the bike fit and field testing can't be ignored. You need to make sure the position makes sense, it has to be safe, the rider has to be able to see, has to be able to handle the bike at speed and be able to put out power. Some of that can come from adaptation over time...but bike fitting and field testing helps you know if the gap can be bridged, or you need to look for speed elsewhere.
I learned so much from the process, both in what to do with the Airo App and then how to try and translate it into speed on the velodrome. It's the second time I've used the Airo App and then confirmed the results in the velodrome and both times we've found consistency in the results and it has helped explore more options than would be possible in the velodrome alone.
If you want to find out how we can make you faster, get in touch
Add comment
Comments